![[object Object]](https://res.cloudinary.com/dlwdq84ig/image/upload/w_3840,q_auto,c_scale/x1qgcm5jcooqwptm0kbq)
How to Use a Pizza Oven: Your Guide to Perfect Backyard Pies
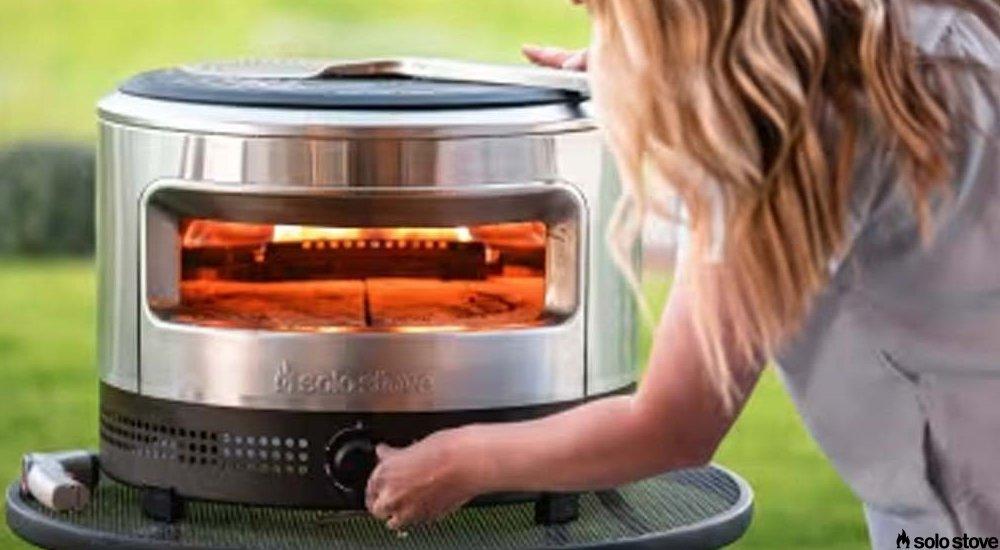
Transitioning from a standard kitchen range to a dedicated outdoor pizza oven involves a steep learning curve, primarily due to the shift from radiant heat to high-intensity, open flames. This introductory guide serves as a foundation, detailing the essential mechanics of fuel management and temperature regulation. By focusing on these core technical skills, anyone can bridge the gap between amateur outdoor cooking and consistent, restaurant-quality cooking with our Expert tips.
The Essential Pizza-Making Checklist
Equipping yourself with the right accessories is a critical step towards success in the outdoor kitchen. Before you attempt your first cook, ensure you have the essential tools ready to go. Here are the essentials our Experts recommend:
-
Infrared Thermometer: Use an infrared thermometer to ensure the stone is hot enough to prevent sticking, as built-in ambient thermometers don't accurately measure the baking surface.
-
Preparation Peel: Wooden peels are ideal for building and launching (sliding into the oven) pizzas, since raw dough sticks less to the wood. A well-dusted metal peel is a common alternative.
-
Turning Peel: A turning peel is a small, long-handled tool used to continuously rotate the pizza, ensuring an even bake in the oven's directional heat without having to remove the pie.
-
Heat-Resistant Gloves: High-quality, heat-resistant gloves are essential to protect your hands and forearms from the intense radiant heat of the oven.
-
Quality Fuel: Ensure you have a full propane tank for gas-powered ovens or a steady supply of kiln-dried hardwood and food-grade pellets for wood-fired models.
Choosing Your Fuel Source
The fuel source you choose significantly impacts both the flavor of your food and the way you manage your heat. Modern outdoor pizza ovens generally fall into two categories: gas-powered and wood-fired.
Gas-Powered Pizza Ovens
Gas-powered ovens offer the most convenience for beginners, featuring simple propane ignition and consistent, low-maintenance flames. By eliminating the need to manage fuel or ash, they allow you to focus entirely on perfecting your dough and toppings.
Wood-Fired and Pellet Pizza Ovens
Wood-fired ovens provide an authentic smoky flavor but require more active fire management. After starting with kindling, you must periodically add hardwood chunks or pellets to the fuel tray to maintain a consistent rolling flame throughout your bake.
How to Use Your Outdoor Pizza Oven
To ensure your outdoor pizza oven produces a professional-grade pizza rather than an overdone or doughy center-pizza, following a precise sequence of heat management and technique is essential. Here are the steps you need to master the art of the perfect bake:
Step 1: Preheating for Perfect Results
Preheating is the most critical step for a crispy crust, as the baking stone takes much longer to heat than the air inside the oven.
-
Ignite: Set gas ovens to max or establish a rolling wood flame.
-
Wait: Allow 20–30 minutes for the stone to fully absorb thermal energy.
-
Verify: Use an infrared thermometer to check the center of the stone.
-
Target Temp: Aim for 400°C to 455°C (750°F–850°F) for a classic Neapolitan bake.
Step 2: Preparing and Launching Your Pizza
Preparing and launching your pizza requires speed and a "less is more" approach to ensure the dough slides easily onto the stone.
Building & Launching Tips
-
Stretch: Shape your dough to 10–12 inches on a clean, dry surface.
-
Prep the Peel: Dust your peel with semolina or cornmeal; these act like "ball bearings" to prevent sticking.
-
The Shake Test: Give the peel a quick shake before adding toppings. If the dough doesn't slide freely, add more semolina underneath.
-
Toppings: Keep it light. Overloading with sauce and cheese makes the pie heavy, hard to launch, and prone to uneven cooking.
-
The Launch: With the peel near the center of the stone, use a swift, confident snapping motion to pull the peel back, leaving the pizza behind.
Step 3: The Art of the Turn
Once the pizza hits the stone, the process moves fast—usually finishing in just 60 to 90 seconds. Because the heat source is directional, constant attention is required to prevent burning.
-
Wait for the Set: Give the dough 15–20 seconds to firm up before attempting to move it.
-
The Quarter Turn: Use a turning peel to rotate the pizza 90 degrees every 15–20 seconds to ensure an even char.
-
Watch the Flame: Keep the pizza near the center of the stone, moving it away from the intense rear heat if the edges brown too quickly.
-
The Finish: Look for bubbling cheese and a "leopard-spotted" crust.
-
Rest: Transfer the pie to a cooling rack for one minute before slicing to let the cheese set.
Troubleshooting Common Pizza Oven Mistakes
Even the most experienced chefs face a learning curve with high-heat ovens. Use these quick fixes to refine your technique:
-
Dough Sticking: Build your pizza quickly so it doesn't sit on the peel. Ensure the surface is bone-dry and heavily dusted with semolina. If the sauce touches the peel, clean and dry it completely before the next attempt.
-
Burnt Top / Raw Bottom: Your stone wasn't hot enough. Always wait for the center of the stone to reach 400°C (750°F) via infrared thermometer. Avoid heavy toppings, which insulate the dough and prevent it from cooking through.
-
Crust Catches Fire: This is usually caused by excess flour or oily toppings hitting the flame. If the edge ignites, stay calm—use your turning peel to pull the pizza away from the heat source, and the flame will typically go out.
Mastering a high-heat pizza oven is a rewarding process that values technical preparation over guesswork. By combining the right gear—like infrared thermometers and specialized peels—with a solid understanding of fuel and temperature management, you can skip the steep learning curve and produce restaurant-quality results at home. For additional questions, hands-on advice, or guidance on creating the perfect setup, visit your local SCHEELS to speak with an Expert.