
How to Lace Running Shoes
Improving your running performance comes down to the small details that can make a big impact on achieving your new personal best. One factor that is often overlooked is how you lace your shoes. The right lacing technique can provide better support, enhance comfort, and even help prevent injuries. Whether you're looking to accommodate your foot type or address specific issues like heel slippage or pressure points, adjusting your laces is a simple yet effective way to optimize your run.
Most Common Issues for Everyday Runners
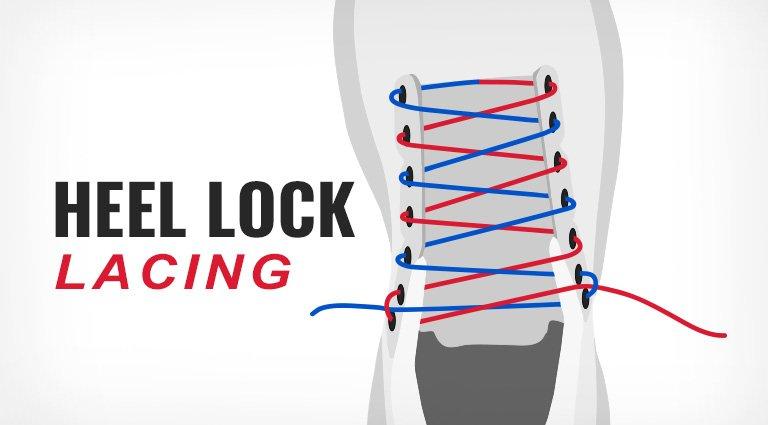
Issue #1: Heel Slippage & Movement in Shoe
The heel lock lacing technique will prevent blisters and discomfort. This will make sure that your heel stays in place, while maintaining stability throughout your run.
-
Lace your shoes in the usual criss-cross pattern until the second-to-last eyelet.
-
Thread the lace through the last eyelet so that the lace comes out on the inside of the shoe.
-
Create a loop between the last two eyelets.
-
Cross your laces and insert them through the loops that you’ve created and pull tightly, securing the shoe around your foot.
-
Tie your shoes as you normally would.
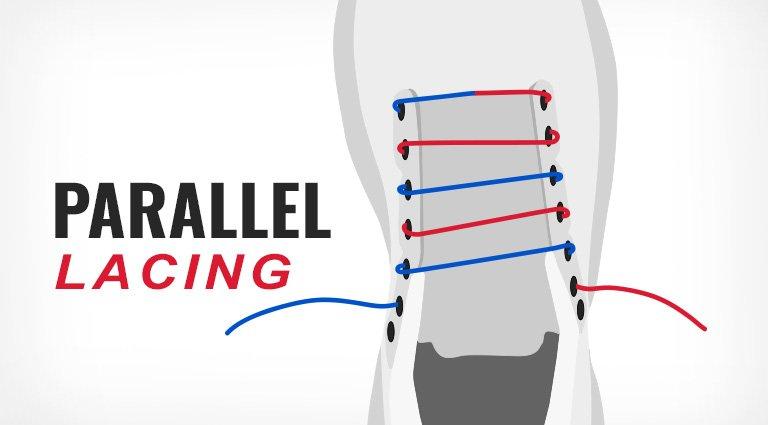
Issue #2: Shoes are Too Tight
When your shoes are too tight, the parallel lacing technique evenly distributes the pressure throughout your foot. Keep in mind that your shoes might feel too tight not just because of the lacing, but also due to your foot width or pronation style.
-
Skip alternate eyelets for each lace in a parallel fashion and run the lace up the side of the eyelets to reduce pressure.
-
Tie your shoes as you normally would.
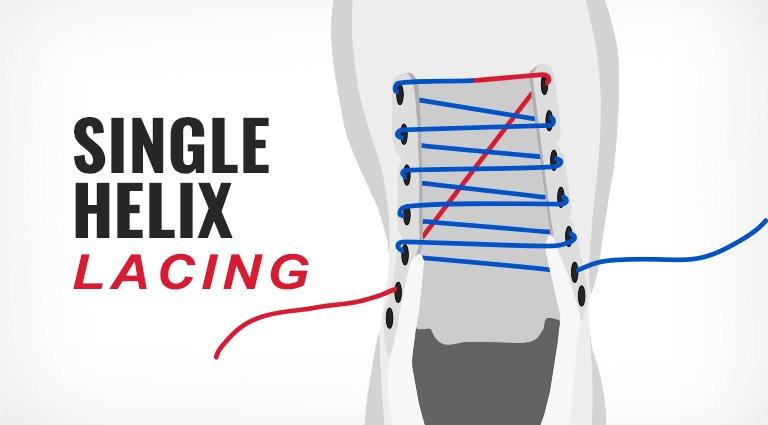
Issue #3: Pain in Toes
Lace up your shoes by giving your toes more space with the single helix technique that focuses on lifting the toe box. This technique would be beneficial if you get black toenails or feel pressure/pain in your toes.
-
Lace diagonally across the shoe from the bottom eyelet near the big toe to the top of the eyelet on the opposite side.
-
Use the other lace to criss-cross across all the eyelets to represent a helix pattern.
-
Tie up your shoes making sure one lace is slightly longer than the other!
Generalized Lacing Techniques
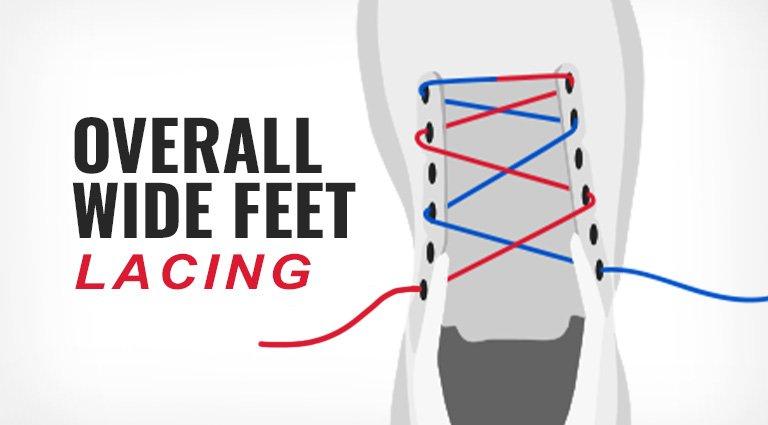
Wide Feet
-
Start the first two eyelets on each side with a normal criss-cross.
-
Continue to criss-cross but thread in every other eyelet.
-
Tie your shoes as you normally would.
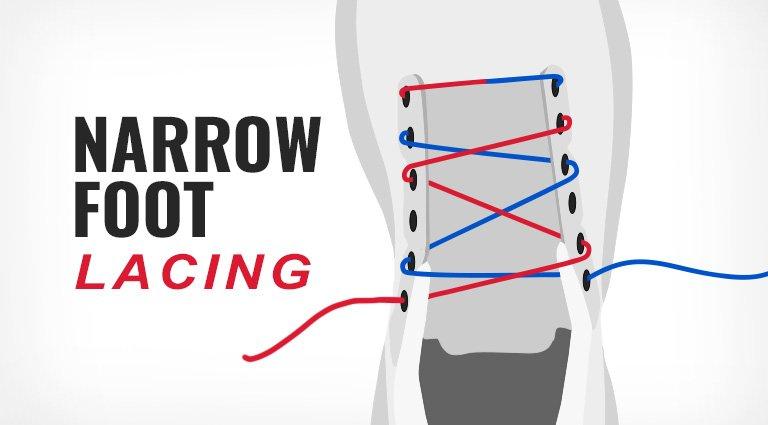
Narrow Feet
-
Start with lacing the first three eyelets on each side with a normal criss-cross.
-
Skip an eyelet on each side and continue with a regular criss-cross until you reach the end.
-
Tie your shoes as you normally would.
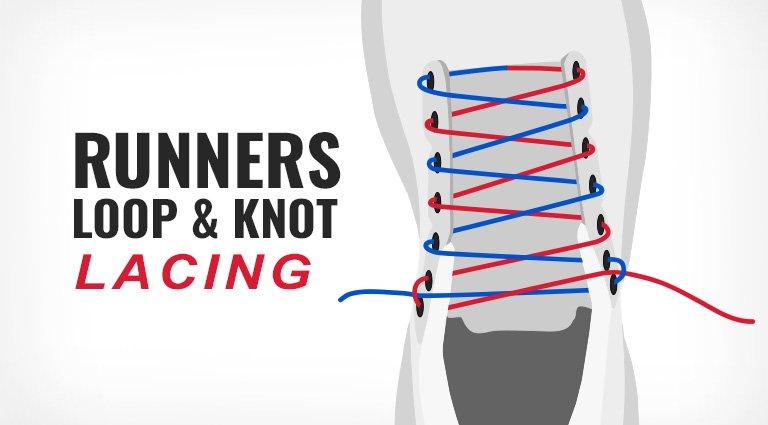
End With a Runners Loop & Knot
-
Use your preferred lacing technique.
-
Instead of crossing the laces for the last set of eyelets, insert each lace into the final eyelet on the same side, creating a small loop.
-
Take each lace and thread it through the loop on the opposite side.
-
Pull both laces to tighten the loops and create a snug fit around your ankle.
-
Tie your shoes as you normally would.
If you have more questions about a specific lacing technique, stop by your local SCHEELS and speak with a Footwear Expert. They can recommend a technique that would work best for your foot type!