



How to Fletch Arrows
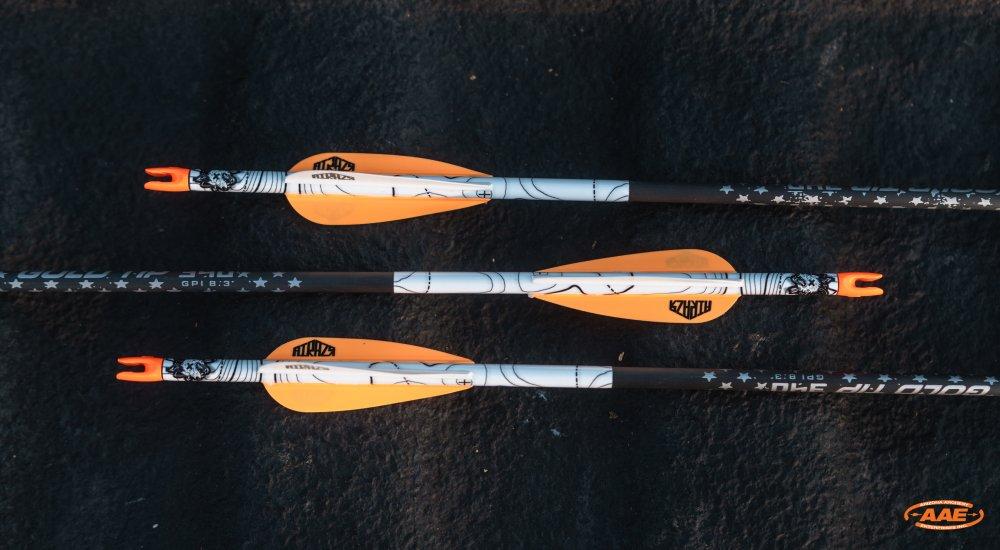
Whether you are preparing for opening day in the woods or fine-tuning your bow for tighter target groupings, your arrow's fletching serves as the steering wheel that drives every shot downrange. In this guide, you will explore straight, offset, and helical orientations, compare popular vane materials, and follow an easy step-by-step DIY process to build precision arrows with confidence.
The Importance of Fletchings
While hunters often celebrate micro-diameter shafts and heavy-duty inserts, the fletching at the rear of the shaft actually drives the arrow downrange, like the tires on a vehicle. When you release an arrow, the broadhead up front creates wind resistance that tries to steer the shaft off course. The fletchings counteract this front-end steering by catching air, stabilizing the shaft, and spinning it.
Learning to assemble your own arrows provides three major advantages:
-
Cost Savings: Purchasing bare arrow shafts and bulk vanes in separate packages lowers your per-arrow costs over time.
-
Time Efficiency: You no longer need to drop off damaged arrows at a shop and wait for repairs.
-
Total Customization: You gain complete control over vane colors, profile heights, and orientation angles to match your exact bow setup.
Choosing Your Fletch Orientation
Straight Fletching
-
Characteristics: Frequently found pre-fletched on factory shafts; delivers slightly higher arrow speed but creates minimal rotational spin.
-
Best Use: Close-range target archery or shooters using mechanical broadheads.
Offset Fletching
-
Characteristics: Offers a balanced middle ground in rotational spin between straight and helical orientations.
-
Best Use: A versatile middle ground for both fixed-blade and mechanical broadheads.
Helical Fletching (Right or Left)
-
Characteristics: Rotates the arrow shaft rapidly like a gyroscope for maximum broadhead stabilization and downrange accuracy.
-
Trade-offs: Requires careful rest/cable clearance tuning and slightly decreases overall fps.
-
Best Use: Bowhunters seeking top-tier precision with fixed-blade or mechanical broadheads.
Vane Options and Material Choices
High-Profile Vanes
- Key Benefits: Ultra-stiff build rapidly stabilizes broadhead-tipped arrows downrange.
Low-Profile Vanes
- Key Benefits: Delivers quieter flight, increased speed, and optimal clearance past cables and arrow rests.
Feathers
- Key Benefits: Extremely lightweight material that produces maximum spin; ideal for traditional archers or those shooting without a mechanical release aid.
Fletching Gear Checklist
Required Supplies:
-
Arrow shafts and vanes.
-
Fletching jig
-
Fast-drying fletching adhesive or blu-glu.
-
Denatured alcohol and paper towels for surface preparation.
Expert Tip: Units in bullet points are abbreviated (e.g., 2 in., 6 grains) in accordance with style guidelines.
Step-by-Step Arrow Fletching Guide
Fletching an arrow is a straightforward process that takes roughly one minute per shaft once your gear is prepared. Follow these eight steps for clean, long-lasting vane adhesion.
-
Clean the Arrow Shaft: Soak a clean paper towel in denatured alcohol and thoroughly wipe down the nock end of the arrow shaft to remove grease, dust, or factory residue. Allow it to dry completely.
-
Place Fletchings into Jig: Load three vanes into the corresponding slots on your fletching jig arms. Ensure the index vane (cock vane) aligns with the designated slot on the jig.
-
Apply Fletching Glue: Run a thin, uniform bead of fast-drying adhesive along the base of each vane. Avoid over-applying glue to prevent excess squeeze-out.
-
Insert Arrow into Jig: Place the arrow shaft into the jig until the nock seats firmly at the bottom. Release the spring-loaded lower collar by pulling back and twisting a quarter turn.
-
Lock the Fletching Jig: Slide the top collar down over the arrow shaft, align the arm grooves, and press firmly into place. Hold or clamp for 10 seconds to allow the adhesive to set.
-
Remove the Fletched Arrow: Disengage the top sliding collar, release the lower collar, and carefully pull the arrow out of the jig.
-
Clean Off Excess Glue: Gently wipe away any excess glue from between the vanes and off the jig arms using a paper towel.
-
Tip and Tail the Vanes: Apply a small dot of glue to both the front tip and rear tail of each fletching. This simple step prevents brush or target foam from peeling your vanes off in the field.
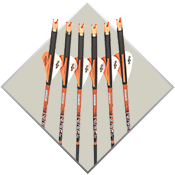
Building your own custom arrows is one of the most rewarding skills in archery. By pairing the ideal fletching orientation with the right vane profile for your bow, you will achieve cleaner flight, tighter groupings, and dependable broadhead performance.
If you have questions about choosing the right fletching jig, selecting vane profiles, or tuning your arrow setup, stop by your local SCHEELS to speak with our certified Archery Technicians and Experts. We are always right there with you to help you gear up for your next pursuit.